

How to set up Cucumber in Cypress 10?
As not long ago we were introduced to Cypress v10 with breaking changes. The process of installation of cypress is quite simple and easy but we’ll look at how to install and configure cucumber with it.
PJ Dec 13, 2022 • 2 min read
Before we start, let's talk about what cucumber is and why we use it here
What is Cucumber?
Cucumber is a tool that supports behavior-driven development (BDD). It runs automated acceptance tests written in BDD format. Cucumber provides a way to write tests that anybody can understand, regardless of their technical knowledge. It explains test steps and application behavior in simple English using the Gherkin language.
You can read further about cucumber here
Let's add cucumber to cypress and automate a simple login flow
There are a few prerequisites before we can start installing cucumber, you need to have these tools to initiate project setup.
Prerequisites
Step 1: Install cucumber
- Type the below command on the terminal to install cucumber
1
2
npm i @badeball/cypress-cucumber-preprocessor
npm i cypress @bahmutov/cypress-esbuild-preprocessor esbuild- The next step is to set the configurations in
cypress.config.jsfile
1
2
3
4
5
6
7
8
9
10
11
12
13
14
15
16
17
18
19
20
21
22
23
24
25
const { defineConfig } = require('cypress');
const createBundler = require('@bahmutov/cypress-esbuild-preprocessor');
const addCucumberPreprocessorPlugin =
  require('@badeball/cypress-cucumber-preprocessor').addCucumberPreprocessorPlugin;

const createEsBuildPlugin =
  require('@badeball/cypress-cucumber-preprocessor/esbuild').createEsbuildPlugin;

module.exports = defineConfig({
  e2e: {
    baseUrl: 'https://opensource-demo.orangehrmlive.com/', //setting BaseUrl
    viewportWidth: 1920, // Setting the size of the browser
    viewportHeight: 1080, // Setting the size of the browser
    async setupNodeEvents(on, config) {
      // implement node event listeners here
      const bundler = createBundler({
        plugins: [createEsBuildPlugin(config)],
      });
      on('file:preprocessor', bundler);
      await addCucumberPreprocessorPlugin(on, config);
      return config;
    },
    specPattern: 'cypress/e2e/*.feature', // select all feature file from e2e folder
  },
});
- Create a new file named
.cypress-cucumber-preprocessorrc.jsoninside the root directory of your project and specify the location of step definitions as follows
1
2
3
{
  "stepDefinitions": ["cypress/support/step_definitions/*.js"]
}
Step 2: Write scripts
As we are finished with the basic configuration, we are now ready to write up the script. We will be using https://opensource-demo.orangehrmlive.com/ for this purpose and automating the Login test case for demonstration.
Create a file called login.feature in the e2e folder, see the snippet below
1
2
3
4
5
Feature: Login
    Scenario: Login user with correct email and password
        Given the user navigate to the login page
        When the user enter login credentials
        Then the user should be logged in
Then create a file called login.js in the following directory cypress/support/step_definitions, see the snippet below
1
2
3
4
5
6
7
8
9
10
11
12
13
14
15
import { Given, When, Then } from '@badeball/cypress-cucumber-preprocessor';
Given('the user navigate to the login page', () => {
  cy.visit('/web/index.php/auth/login');
});
When('the user enter login credentials', () => {
  cy.contains('Login').should('be.visible');
  cy.get('input[name="username"]').type('Admin');
  cy.get('input[name="password"]').type('admin123');
  cy.get('button[type="submit"]').click();
});
Then('the user should be logged in', () => {
  cy.get('.oxd-topbar-header-title')
    .should('be.visible')
    .and('contain', 'Dashboard');
});
Step 3: Run scripts
At this point, add the script in your package.json to run cypress. You can directly open cypress Launchpad from here
1
"cypress:open": "cypress open"Now we can run the below command to open cypress UI
1
npm run cypress:openand select login.feature from your feature files inside the Spec Explorer
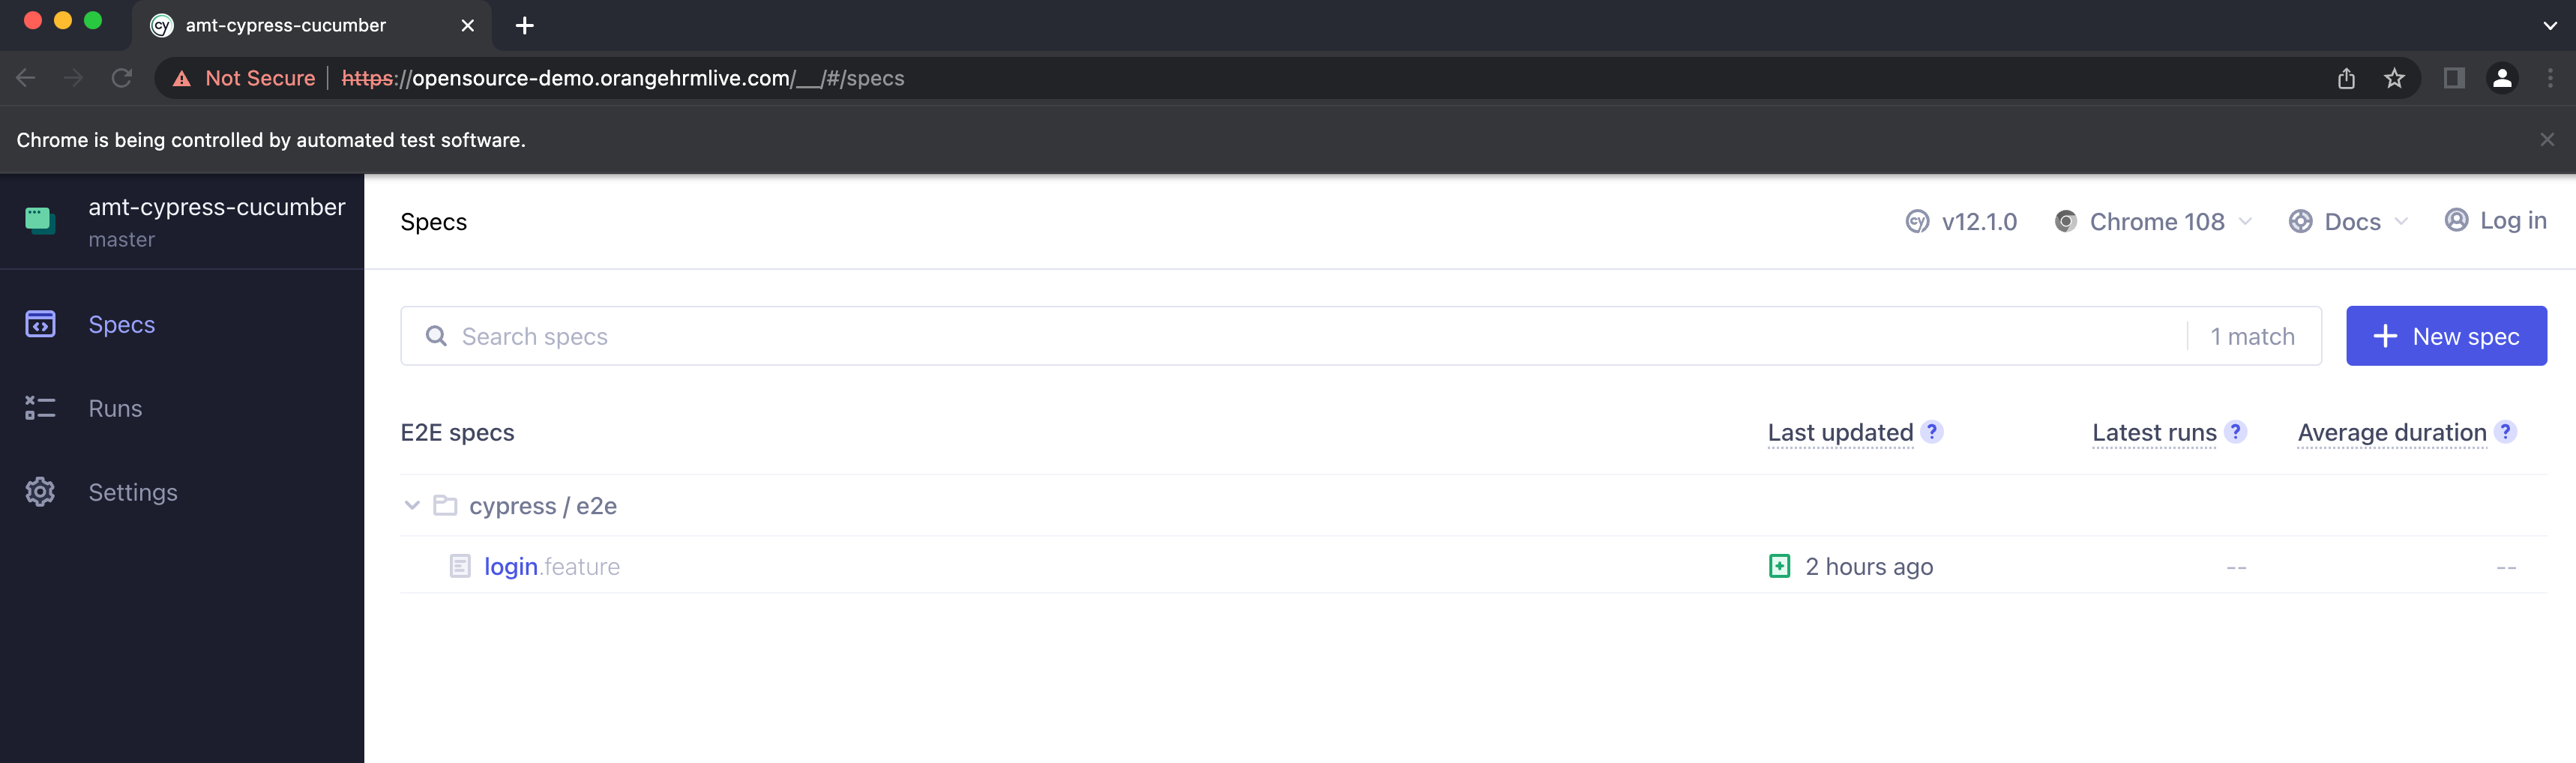
I hope you found this article helpful. Follow the above steps and run your first test case with cypress and let me know how it went in the comments.
Link to GitHub code